

스프링부트 프로젝트
스프링 부트 SpringBoot 웹 애플리케이션 개발 #6 스프링 인증 구현
스프링부트 프로젝트 스프링 부트 SpringBoot 웹 애플리케이션 개발 #5 백엔드 프론트엔드 통합 구현하기 스프링 부트 웹 애플리케이션 개발 시리즈 SpringBoot 웹 애플리케이션 개발 #1 프로젝트 시작
incomeplus.tistory.com
스프링 부트 SpringBoot 웹 애플리케이션 개발 #5 백엔드 프론트엔드 통합 구현하기
스프링 부트 웹 애플리케이션 개발 시리즈 SpringBoot 웹 애플리케이션 개발 #1 프로젝트 시작 웹서버 기본 개념 서버란 사용자가 요청하는 응답을 반환하기 위해 무한정 대기하는 프로그램이다.
incomeplus.tistory.com
스프링 부트 SpringBoot 웹 애플리케이션 개발 #4 프론트엔드 구현하기
스프링 부트 웹 애플리케이션 개발하기 시리즈 SpringBoot 웹 애플리케이션 개발 #1 프로젝트 시작 웹서버 기본 개념 서버란 사용자가 요청하는 응답을 반환하기 위해 무한정 대기하는 프로그램이
incomeplus.tistory.com
스프링 부트 SpringBoot 웹 애플리케이션 개발 #3 CRUD 구현하기
CRUD는 웹 서비스의 가장 기본적인 서비스인 생성(Create), 검색(Retrieve), 수정(Update), 삭제(Delete)의 약자다. 사용자의 요청에 따라서 Controller 로직은 URI를 매핑하게 되고, Service 로직에서는 Reposit..
incomeplus.tistory.com
스프링 부트 SpringBoot 웹 애플리케이션 개발 #2 백엔드 개발
백엔드 서비스 아키텍처란? 레이어드 아키텍처 패턴은 스프링 프로젝트를 분리해서 사용자와 서버 프로그램이 유기적인 소통이 가능하도록 한다. 프로젝트 내부에서 어떻게 코드를 관리할 것
incomeplus.tistory.com
SpringBoot 웹 애플리케이션 개발 #1 프로젝트 시작
웹서버 기본 개념 서버란 사용자가 요청하는 응답을 반환하기 위해 무한정 대기하는 프로그램이다. 서버는 정적 웹 서버와 동적 웹서버로 구분되는데, 정적 웹서버는 사용자의 요청에 기계적인
incomeplus.tistory.com
프론트엔드 인증
프론트엔드에서 인증이란 로그인/ 회원가입/ 리디렉션을 구현하는 일이다. 만약 프론트엔드에서 백엔드로 요청을 보냈는데 응답 코드가 403이라면 리디렉션을 해줘야 한다. 또한 백엔드에서 반환하는 토큰을 어딘가에 저장하고, 백엔드에 요청을 보낼 때 마다 해당 토큰을 태워서 요청을 보내야 한다.
react-router-dom
특정 URI로 접속하면 해당 페이지가 반환되고 프론트엔드에서는 렌더링을 해서 사용자에게 보여주게 된다. Standard Routing 방법으로 서버-사이드 라우팅이라고 부르는 방식이다. 하지만 SPA(Single Page Application)에서는 클라이언트-사이드 라우팅 방식을 사용한다. 서버로 요청을 보내지 않고 자바스크립트에서 요청을 수행하게 된다. 한번 서버에서 페이지를 요청받아 렌더링을 한 후에는 자바스크립트에서 해당 페이지에서 발생하는 모든 요청을 처리하게 된다.
만약 사용자가 localhost:3000/login URI를 주소창에 입력하면 리액트 라우터가 이 요청을 가로채 URI를 파싱한 후 자바스크립트를 통해 login 템플릿을 렌더링 한다. 이 경우 인터넷이 연결되어 있지 않아도 웹 페이지는 정상 작동하게 된다. 서버와 아무런 통신이 필요없기 때문이다. 클라이언트 사이드 라우팅 라이브러리 react-router-dom을 설치한다.

$ npm install react-router-dom
AppRouning 구성
localhost:3000/login으로 접속시 리액트 애플리케이션이 렌더링할 Login.js Component를 생성한다. index.js에서 App.js를 대신해서 Routing 작업을 처리해 줄 AppRouter.js를 최초 렌더링 페이지로 설정한다. 이제 AppRouting에 설정된 Routing 규칙에 따라서 리액트 애플리케이션이 페이지를 렌더링 하게 된다.
Login.js
import React from 'react';

class Login extends React.Component{
    constructor(props){
        super(props);
    }

    render(){
        return <p>Login Page</p>;
    }
}

export default Login;
AppRouter.js
import React from "react";
import "./index.css";
import App from "./App";
import Login from "./Login";
import { BrowserRouter as Router, Routes, Route } from "react-router-dom";
import Box from "@material-ui/core/Box";
import Typography from "@material-ui/core/Typography";

function Copyright() {
  return (
    <Typography variant="body2" color="textSecondary" align="center">
      {"Copyright © "}
      fsoftwareengineer, {new Date().getFullYear()}
      {"."}
    </Typography>
  );
}

class AppRouter extends React.Component {
  render() {
    return (
      <div>
        <Router>
          <div>
            <Routes>
                <Route path="/login" element={<Login />}/>
                <Route path="/" element={<App />} />
            </Routes>
          </div>
          <Box mt={5}>
            <Copyright />
          </Box>
        </Router>
      </div>
    );
  }
}

export default AppRouter;
index.js
import React from 'react';
import ReactDOM from 'react-dom';
import './index.css';
import reportWebVitals from './reportWebVitals';
import AppRouter from "./AppRouter";

ReactDOM.render(
  <React.StrictMode>
    <AppRouter />
  </React.StrictMode>,
  document.getElementById('root')
);

// If you want to start measuring performance in your app, pass a function
// to log results (for example: reportWebVitals(console.log))
// or send to an analytics endpoint. Learn more: https://bit.ly/CRA-vitals
reportWebVitals();
리디렉션(Redirection)
서버에 요청한 Request가 접근 거부(Access Denied)되면 /login 경로로 리디렉션이 되어야 한다. 인증되지 않은 사용자가 서비스에 접근하는 것을 차단하기 위해서다. 리액트 애플리케이션에서 접근 거부가 발생할 경우 실제로 fetch() 함수를 실행하는 DemoAPIService 컴포넌트에서 리디렉션 로직을 구현한다.
localhost:8080/ 서버로 fetch() 함수로 API 요청을 던지고 실패하는 경우 .catch() 함수에서 error 상황을 처리하게 된다. 여기서 /login 페이지로 리디렉트 로직을 구현해준다. 다시 localhost:3000/으로 접속하면 403 Forbidden Error Status를 받기 때문에 /login 페이지로 리디렉트 된다.
service/DemoAPIService.js
import { API_BASE_URL } from "../demo-app-config";

export function call(api, method, request){
    let options = {
        headers : new Headers({
            "Content-Type" : "application/json"
        }),
        url : API_BASE_URL + api,
        method : method,
    };
    if(request){
        options.body = JSON.stringify(request);
    }

    return fetch(options.url, options)
        .then(response =>
            response.json().then((json) => {
                if(!response.ok){
                    return Promise.reject(json);
                }
                return json;
            })
        )
        .catch((error) => {
            // 리디렉션
            console.log(error);
            window.location.href = "/login";
            return Promise.reject(error);
        });
}
Login 기능 구현
index.js에서 AppRouter를 기본 컴포넌트로 지정했다. 이제 "/", "/login" URI별로 다른 컴포넌트 기능이 구현된다. 로그인을 위해서는 "/auth/login" URI에 fetch() 함수를 보내는 코드를 구현해야 한다. DemoAPIService.js에서 siginin 함수를 구현한다.
service/DemoAPIService.js
import { API_BASE_URL } from "../demo-app-config";

export function call(api, method, request){
    let options = {
        headers : new Headers({
            "Content-Type" : "application/json"
        }),
        url : API_BASE_URL + api,
        method : method,
    };
    if(request){
        options.body = JSON.stringify(request);
    }

    return fetch(options.url, options)
        .then(response =>
            response.json().then((json) => {
                if(!response.ok){
                    return Promise.reject(json);
                }
                return json;
            })
        )
        .catch((error) => {
            // 리디렉션
            console.log("error occured!");
            console.log(error);
            console.log(error.status);
            window.location.href = "/login";
            return Promise.reject(error);
            // if(error.status === 403){

            // }

        });
}

export function signin(userDTO){
    return call("/auth/signin", "POST", userDTO)
        .then((response)=>{
            console.log("response : ", response);
            alert("Login Token : "+ response.token)
        })
}
siginin 함수를 동작시킬 Login.js를 구현한다. TextField에서 email과 password를 받아온다. 로그인 버튼을 클릭할 경우 submit 함수로 handleSubmit()를 호출하고 handleSubmit() 내부에서 eventObject를 가져와 데이터를 구성하고 siginin() 함수를 호출한다.
bind() 메소드
Login 컴포넌트 내에서 생성한 handleSubmit은 Login 내에서만 사용되기 때문에 bind() 함수를 추가해서 Login 오브젝트 값으로 호출되도록 지정해줘야 한다. 특정한 지정이 없으면 Login 내의 handleSubmit 메소드를 실행할 때 원본 객체가 소실되어 버리기 때문이다.
this.handleSubmit = this.handleSubmit.bind(this)
Login.js
import React from 'react';
import { signin } from "./service/DemoAPIService"
import { Link, Button, Container, TextField, Grid, Typography } from "@material-ui/core";


class Login extends React.Component{
    constructor(props){
        super(props);
        this.handleSubmit = this.handleSubmit.bind(this);
    }

    handleSubmit(e){
        e.preventDefault();
        const data = new FormData(e.target);
        const email = data.get("email");
        const password = data.get("password");
        signin({email : email, password : password});
    }

    render(){
        return(
            <Container component="main" maxWidth="xs" style={{marginTop : "8%"}}>
                <Grid container spacing={2}>
                    <Grid item xs={12}>
                        <Typography component="h1">
                            로그인
                        </Typography>
                    </Grid>
                </Grid>
                <form noValidate onSubmit={this.handleSubmit}>
                    <Grid container spacing={2}>
                        <Grid item xs={12}>
                            <TextField
                                variant='outlined'
                                fullWidth
                                required
                                id="email"
                                label="이메일 주소"
                                name="email"
                                autoComplete="email"

                            />
                        </Grid>
                        <Grid item xs={12}>
                            <TextField
                                variant="outlined"
                                fullWidth
                                required
                                name="password"
                                id="password"
                                label="비밀번호"
                                autoComplete="current-password"
                            />
                        </Grid>
                        <Grid item xs={12}>
                            <Button
                                type="submit"
                                fullWidth
                                variant="contained"
                                color = "primary"
                            >
                                Login
                            </Button>
                        </Grid>
                        <Grid container justify="flex-end" style={{marginTop : 20}}>
                            <Link href="/signup" variant="body2">
                                <Grid item>계정이 없나요? 무료 회원가입 이동</Grid>
                            </Link>
                        </Grid>
                    </Grid>
                </form>
            </Container>
        )
    }
}

export default Login;
스프링 Tomcat 서버를 동작시킨 상태에서 사용자를 생성하고, localhost:3000/login 으로 접속해서 email과 password로 로그인을 진행하면 Token을 출력하는 alert()가 정상작동한다. 서버에 생성된 사용자 정보로 프론트엔드에서 정상적으로 사용자 인증에 성공한 것이다.


로컬 스토리지(Local Storage) 구성
토큰값을 받아오는데 성공했다는 것은 사용자 인증이 가능하다는 뜻이다. 토큰값을 토대로 인증을 마친 후의 로직은 CRUD 생성 화면으로 이동하여 사용자만의 TodoList를 생성하는 것이다. 하지만 여기서 문제가 발생한다. 바로 Token값을 저장할 디렉토리가 없다는 것이다. "/" URI로 이동하면 바로 로그인 화면으로 리디렉트 되는 현상이 발생한다.
DemoAPIService.js
export function signin(userDTO){
    return call("/auth/signin", "POST", userDTO)
        .then((response)=>{
            if(response.token){
                // Token이 존재하는 경우
                window.location.href = "/";
            }
        })
}
즉, 로그인 화면에서 토큰을 받아오는데 까지는 성공했지만 토큰을 저장하지 못한 상태에서 새로운 요청을 보내면 토큰이 없는 것과 마찬가지 상황에 직면하게 되는 것이다. 토큰값이 유효하지 않으면 스프링 웹 서버에서는 null 값을 반환하고, 403 Status Code를 반환한다. 리액트 프로그램에서는 로그인 화면에서 벗어날 수 없게 된다. 이 문제를 해결하기 위해서는 로컬 스토리지에 토큰값을 저장해야 한다.
로컬 스토리지(Local Storage)
웹 스토리지를 이용하면 Key~Value 형태로 데이터를 저장하게 되며, 쿠키(cookie)와 유사한 형태로 저장한다. 웹 스토리지는 세션 스토리지(Session Storage)와 로컬 스토리지(Local Storage)로 구분된다. 두개의 스토리지 차이점은 세션 스토리지의 경우 브라우저를 종료할 때 까지만 유효한 값을 저장한다. 반면 로컬 스토리지는 브라우저가 종료되어도 유지된다.
웹 브라우저에서 LocalStorage와 SesseionStorage를 테스트 해볼 수 있다.
localStorage.setItem("Local Storage", "TestValue");
sessionStorage.setItem("Session Storage", "TestValue");
application 클릭하면 현재 지정된 LocalStorage와 SessionStorage를 확인할 수 있다. 해당 브라우저를 닫고 다시 오픈하면 LocalStorage는 그대로 등록되어 있는 반면, SessionStorage는 사라져버린다. 또한 다른 도메인에서는 localhost:3000에 등록된 LocalStorage를 접근하지 못한다.


로그인 하는 경우 서버에서 반환받은 TOKEN을 저장해야 한다. ACCESS TOKEN이란 이름으로 TOKEN을 LocalStorage에 저장하고 로그인, CRUD API 요청시 마다 ACCESS TOKEN값을 참조하여 Header에 태워서 요청을 보내게 된다. Header에 추가되는 Token 값의 형태는 다음과 같다.
{
	"Authorization" : "Bearer TokenValue",
}
service/DemoAPIService.js
import { API_BASE_URL } from "../demo-app-config";

export function call(api, method, request){

	// Header
    let headers = new Headers({
        "Content-Type" : "application/json"
    })

    // LocalStorage 가져오는 부분
    const accessToken = localStorage.getItem("ACCESS_TOKEN");
    if(accessToken){
        headers.append("Authorization", "Bearer "+accessToken);
    }

	// Options
    let options = {
        headers : headers,
        url : API_BASE_URL + api,
        method : method,
    };

    if(request){
        options.body = JSON.stringify(request);
    }

    return fetch(options.url, options)
        .then(response =>
            response.json().then((json) => {
                if(!response.ok){
                    return Promise.reject(json);
                }
                return json;
            })
        )
        .catch((error) => {
            // 리디렉션
            console.log("error occured!");
            console.log(error);
            console.log(error.status);
            window.location.href = "/login";
            return Promise.reject(error);
            // if(error.status === 403){

            // }

        });
}

export function signin(userDTO){
    return call("/auth/signin", "POST", userDTO)
        .then((response)=>{
            if(response.token){
                // Token이 존재하는 경우 LocalStorage에 TOKEN 저장
                localStorage.setItem("ACCESS_TOKEN", response.token);
                // 유효한 토큰 값을 가진 경우 메인 페이지로 이동
                window.location.href = "/";
            }
        })
}


export function signup(userDTO){
    return call("/auth/signup", "POST", userDTO);
}
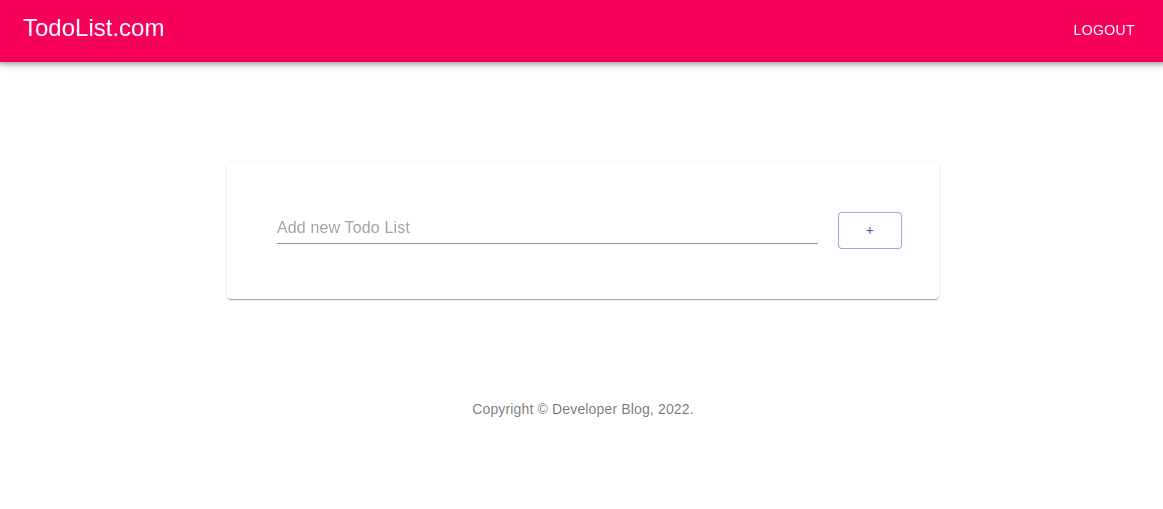
PostMan에서 생성한 로그인 정보로 로그인을 하면 로그인 화면으로 리디렉트 되지 않고 Todo List를 생성하는 "/" URI로 접속해 화면을 정상적으로 렌더링 해올 수 있게 되었다.
로그아웃 구현
로그아웃 기능은 LocalStorage에 저장된 ACCESS_TOKEN 값을 null로 지정하고 "/login"으로 이동하는 로직을 넣어주면 된다. DemoAPIService.js에서 logout 함수를 구현한다.
service/DemoAPIService.js
export function logout(){
	//LocalStorage의 ACCESS_TOKEN을 null로 지정
    localStorage.setItem("ACCESS_TOKEN", null);
    window.location.href = "/";
}
Logout 기능을 동작하는 Button을 구성해준다.
App.js
import logo from './logo.svg';
import Demo from './Demo.js';
import './App.css';
import React from 'react';
import { Paper, List } from "@material-ui/core";
import DemoTodoList from './DemoTodoList.js';
import {call, logout} from "./service/DemoAPIService.js";
import { AppBar, Toolbar, Grid, Typography, Button, Container } from "@material-ui/core";


class App extends React.Component{
  constructor(props){
    super(props)
    this.state = {
      items : []
    }
  }


  add = (item) => {
    call("/crud", "POST", item)
      .then((response) => this.setState({items : response.data}));
  }

  delete = (item) => {
    call("/crud", "DELETE", item)
      .then((response) => this.setState({items : response.data}));
  }

  update = (item) => {
    call("/crud", "PUT", item)
      .then((response) => this.setState({items : response.data}));
  }

  componentDidMount(){
    call("/crud", "GET", null)
      .then((res) => this.setState({items : res.data}));
  }


  render(){
    var demoItems = this.state.items.length > 0 && (
      <Paper style = {{margin:100 , marginRight:200 , marginLeft:200}}>
        <List>
          {this.state.items.map((item, idx) => (
            <Demo item={item} key={item.id} delete={this.delete} update={this.update}/>
          ))}
        </List>
      </Paper>
    );

	// logout Button 컴포넌트 구현
    var navigationBar = (
      <AppBar position="static" color="secondary">
        <Toolbar>
          <Grid justify="space-between" container>
            <Grid item>
              <Typography variant="h5">
                TodoList.com
              </Typography>
            </Grid>
            <Grid>
              <Button color="inherit" onClick={logout}>
                Logout
              </Button>
            </Grid>
          </Grid>
        </Toolbar>
      </AppBar>
    )

    return (
      <div className="App">
        { navigationBar }
        <Container maxWidth="md">
          <DemoTodoList add={this.add} />
          <div className="TodoList">{demoItems}</div>
        </Container>


      </div>
    );
  }

}

export default App;
툴바의 로그아웃 버튼을 클릭하면 ACCESS_TOKEN 값이 'null'로 변경되고 정상적으로 "/login"으로 리디렉트 되는 것을 확인할 수 있다.

UI 글리치 문제 해결
localhost:3000에 접속하면 잠깐, 찰나의 순간이지만 TodoList를 디스플레이했다가 로그인 화면으로 넘어가는 것을 볼 수 있다. 이 현상이 나타나는 원인은 서버에 사용자의 정보를 토대로 인증을 하는 과정에서 시간이 소요되기 때문이다. 이 문제를 해결하기 위해서 서버에 요청하는 동안 다른 화면으로 대체를 해준다.
먼저 App.js에서 생성자에 loading 여부를 판별할 상태 변수를 추가해준다. 디폴트 값으로는 true를 할당한다. 서버에서 정상적으로 데이터를 받아오면 componentDidMount()에서 ReactDOM을 생성할 때 loading을 false로 변경해준다. 상태변수 loading을 체크해서 현재 로딩중이면 해당 컴포넌트를 출력하고 데이터를 정상적으로 받아오는 경우 데이터를 담은 컴포넌트를 출력한다.
App.js
import logo from './logo.svg';
import Demo from './Demo.js';
import './App.css';
import React from 'react';
import { Paper, List } from "@material-ui/core";
import DemoTodoList from './DemoTodoList.js';
import {call, logout} from "./service/DemoAPIService.js";
import { AppBar, Toolbar, Grid, Typography, Button, Container } from "@material-ui/core";


class App extends React.Component{
  constructor(props){
    super(props)
    this.state = {
      items : [],
      // UI 글리치를 해결하기 위해 loading 변수를 추가해준다.
      loading : true,
    }
  }


  add = (item) => {
    call("/crud", "POST", item)
      .then((response) => this.setState({items : response.data}));
  }

  delete = (item) => {
    call("/crud", "DELETE", item)
      .then((response) => this.setState({items : response.data}));
  }

  update = (item) => {
    call("/crud", "PUT", item)
      .then((response) => this.setState({items : response.data}));
  }

  componentDidMount(){
    call("/crud", "GET", null)
      .then((res) => this.setState({items : res.data, loading:false}));
  }


  render(){
    var demoItems = this.state.items.length > 0 && (
      <Paper style = {{margin:100 , marginRight:200 , marginLeft:200}}>
        <List>
          {this.state.items.map((item, idx) => (
            <Demo item={item} key={item.id} delete={this.delete} update={this.update}/>
          ))}
        </List>
      </Paper>
    );

    var navigationBar = (
      <AppBar position="static" color="secondary">
        <Toolbar>
          <Grid justify="space-between" container>
            <Grid item>
              <Typography variant="h5">
                TodoList.com
              </Typography>
            </Grid>
            <Grid>
              <Button color="inherit" onClick={logout}>
                Logout
              </Button>
            </Grid>
          </Grid>
        </Toolbar>
      </AppBar>
    )

    var todoListPage = (
      <div>
        { navigationBar }
        <Container maxWidth="md">
          <DemoTodoList add={this.add} />
          <div className="TodoList">{demoItems}</div>
        </Container>
      </div>

    )
    var loadingPage = (
      <Container style={{marginTop : 60}}>
        <Grid item>
          <Typography component="h1">Loading...</Typography>
        </Grid>

      </Container>
    )

    var content;
    if(this.state.loading){
      content = loadingPage;
    }else{
      content = todoListPage;
    }


    return (
      <div className="App"> { content } </div>
    );
  }

}

export default App;
테스트
회원가입 페이지에서 사용자정보로 등록을 마치고, 로그인 해서 Token을 받아오면서 인증을 마친다. 인증이 완료되면 TodoList 페이지로 이동해서 list 추가, 삭제, 업데이트 기능을 사용할 수 있게 된다.
더 많은 콘텐츠
SpringBoot란? 시작시 주의사항 알아야 하는 개념들
스프링 부트 시작할 때 주의사항 Java를 기반으로 한 웹 프레임워크다. 오픈소스 기반 프레임워크다. SpringBoot는 IoC 컨테이너를 가진다. IoC(Inversion of Control, 제어의 역)이란 개발자가 인스턴스를
incomeplus.tistory.com
'Programming' 카테고리의 다른 글
| 블록체인 이더리움이란? (1) | 2022.04.29 |
|---|---|
| WebSocket 사용으로 실시간 채팅 애플리케이션 구현 Project (0) | 2022.04.12 |
| No tests found for given includes 문제 발생시 스프링부트 해결방법 (0) | 2022.04.08 |
| 자바 스트림이란 What is Stream in JAVA ? (0) | 2022.04.04 |
| 스프링 부트 #6 SpringBoot 웹 애플리케이션 개발 스프링 인증 구현 (0) | 2022.04.04 |
| 스프링 부트 SpringBoot 웹 애플리케이션 개발 #5 백엔드 프론트엔드 통합 구현하기 (0) | 2022.04.02 |


댓글